
The spark plug boot, an important part of your car’s ignition system, plays a vital role in delivering electricity from the ignition coil to the spark plug. As your engine generates heat during operation, the boot is subjected to the harsh conditions that can lead to wear and tear over time. This wear and tear can potentially result in issues such as misfires or even complete ignition failure, which can be both frustrating and costly.
To prevent these problems and ensure the longevity of your fuel system, the glow plug guard is a highly recommended accessory. By shielding the boot from excessive heat and potential damage, the protector acts as a barrier, extending the lifespan of the boot and maintaining optimal performance.
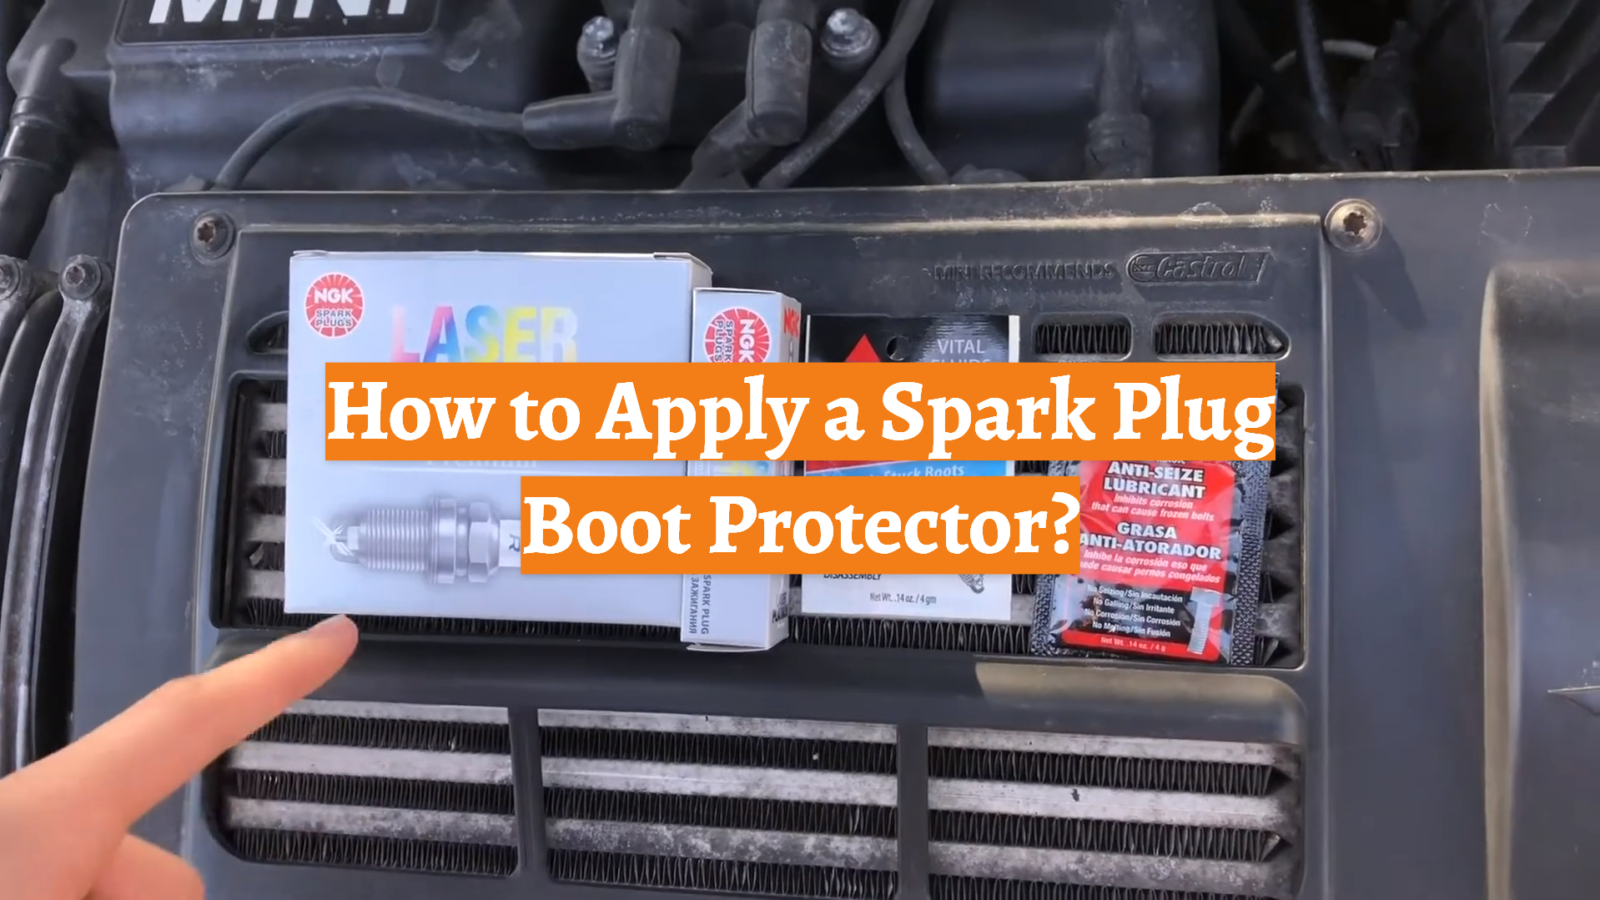
In this comprehensive guide, we will take you through quick step-by-step guidance on the correct way to install the plug protector. By following these instructions, you will not only provide effective protection for your car’s starting system but also optimize its overall performance. With this added level of detail and care, you can enjoy peace of mind knowing that your vehicle’s ignition system is well-maintained and protected for years to come.
What You Should Know Before Getting Started
Before embarking on the process of applying a spark plug guard cover, it is crucial to have a comprehensive understanding of a few key points. Firstly, make certain that the vehicle’s engine is not only turned off but also adequately cooled to minimize any potential accidents or mishaps. This precautionary measure ensures your safety and the optimal condition of the engine.
Secondly, it is important to identify the correct size of the protector that fits your spark plug boot snugly. A perfect fit ensures effective insulation and protection against potential damage. It is worth noting that a protector that is too loose may compromise the insulation, while one that is too tight may exert unnecessary pressure and potentially cause harm to the boot. Taking the time to find the ideal fit will guarantee the longevity and reliability of your spark plug boot.
Lastly, it cannot be emphasized enough that safety should always be the top priority during this process. It is highly recommended to wear safety glasses and gloves to shield yourself from any potential hazards. These protective measures will offer an additional layer of safety and ensure that you are well-prepared to handle any unforeseen circumstances.
By following these steps and paying attention to these details, you will be well-equipped to successfully apply your spark plug boot protector. Your thoroughness and attention to safety will contribute to the longevity and optimal performance of your vehicle’s engine. [1]

Dielectric Grease
Dielectric grease is a versatile and highly effective non-conductive, silicone-based grease that finds wide application in electrical systems. Acting as both a sealant and an insulator, it plays a crucial role in maintaining the integrity of connections. Specifically, when it comes to spark plug boots, dielectric grease takes on added importance. By preventing voltage leakage and ensuring a stable connection between the boot and the spark plug, it helps to optimize the performance of your ignition system.
Before installing the trunk guard, we strongly recommend a thin film of insulating lubricant. Doing so accomplishes several things. Firstly, it facilitates the smooth sliding of the protector onto the boot, ensuring a snug fit and optimal protection. Secondly, and perhaps more importantly, it enhances the overall insulation of the connection, safeguarding your ignition system against the harmful effects of moisture and contaminants. By creating a barrier that seals out these potential threats, dielectric grease helps to preserve the integrity and functionality of your ignition system, ultimately contributing to its longevity and reliability.
However, it is important to exercise caution when applying dielectric grease. It should be used sparingly, as excessive amounts can lead to boot slippage or other unwanted issues. So, while it is certainly beneficial to spray dielectric oil, it is equally important to do so in moderation, ensuring that just the right amount is used to achieve the desired results.
Protective boots Heat Shield
Safety boot covers for Heat Shield shoes are a highly effective solution for guarding your spark plug boots against extreme heat, which can cause significant damage to the boots over time and potentially lead to ignition failure. These protectors are typically made from a durable and heat-resistant material such as fiberglass or ceramic, ensuring long-lasting protection for your ignition system.
If necessary, you can use a tool like a pair of needle-nose pliers to assist in positioning the protector correctly. This can be especially helpful if the boot is positioned in a tight or hard-to-reach area. Take your time and make sure the protector is properly aligned and securely in place.
Once the protector is successfully installed, carefully reconnect the boot to the spark plug. Ensure that it is securely attached, as a loose connection can compromise the effectiveness of the heat shield. It is recommended to give the boot a gentle tug to confirm that it is firmly seated.
Finally, it is important to double-check the fit of the protector once the boot is reconnected. Confirm that it remains firmly in place and provides a reliable heat shield for your spark plug boot. This extra step ensures that you have taken all necessary precautions to protect your ignition system from excessive heat and potential damage.
By following these steps and utilizing Heat Shield Boot Protectors, you can extend the lifespan of your spark plug boots and maintain optimal performance of your ignition system, even in high-temperature environments.
How to Apply Spark Plug Boot Protector Grease
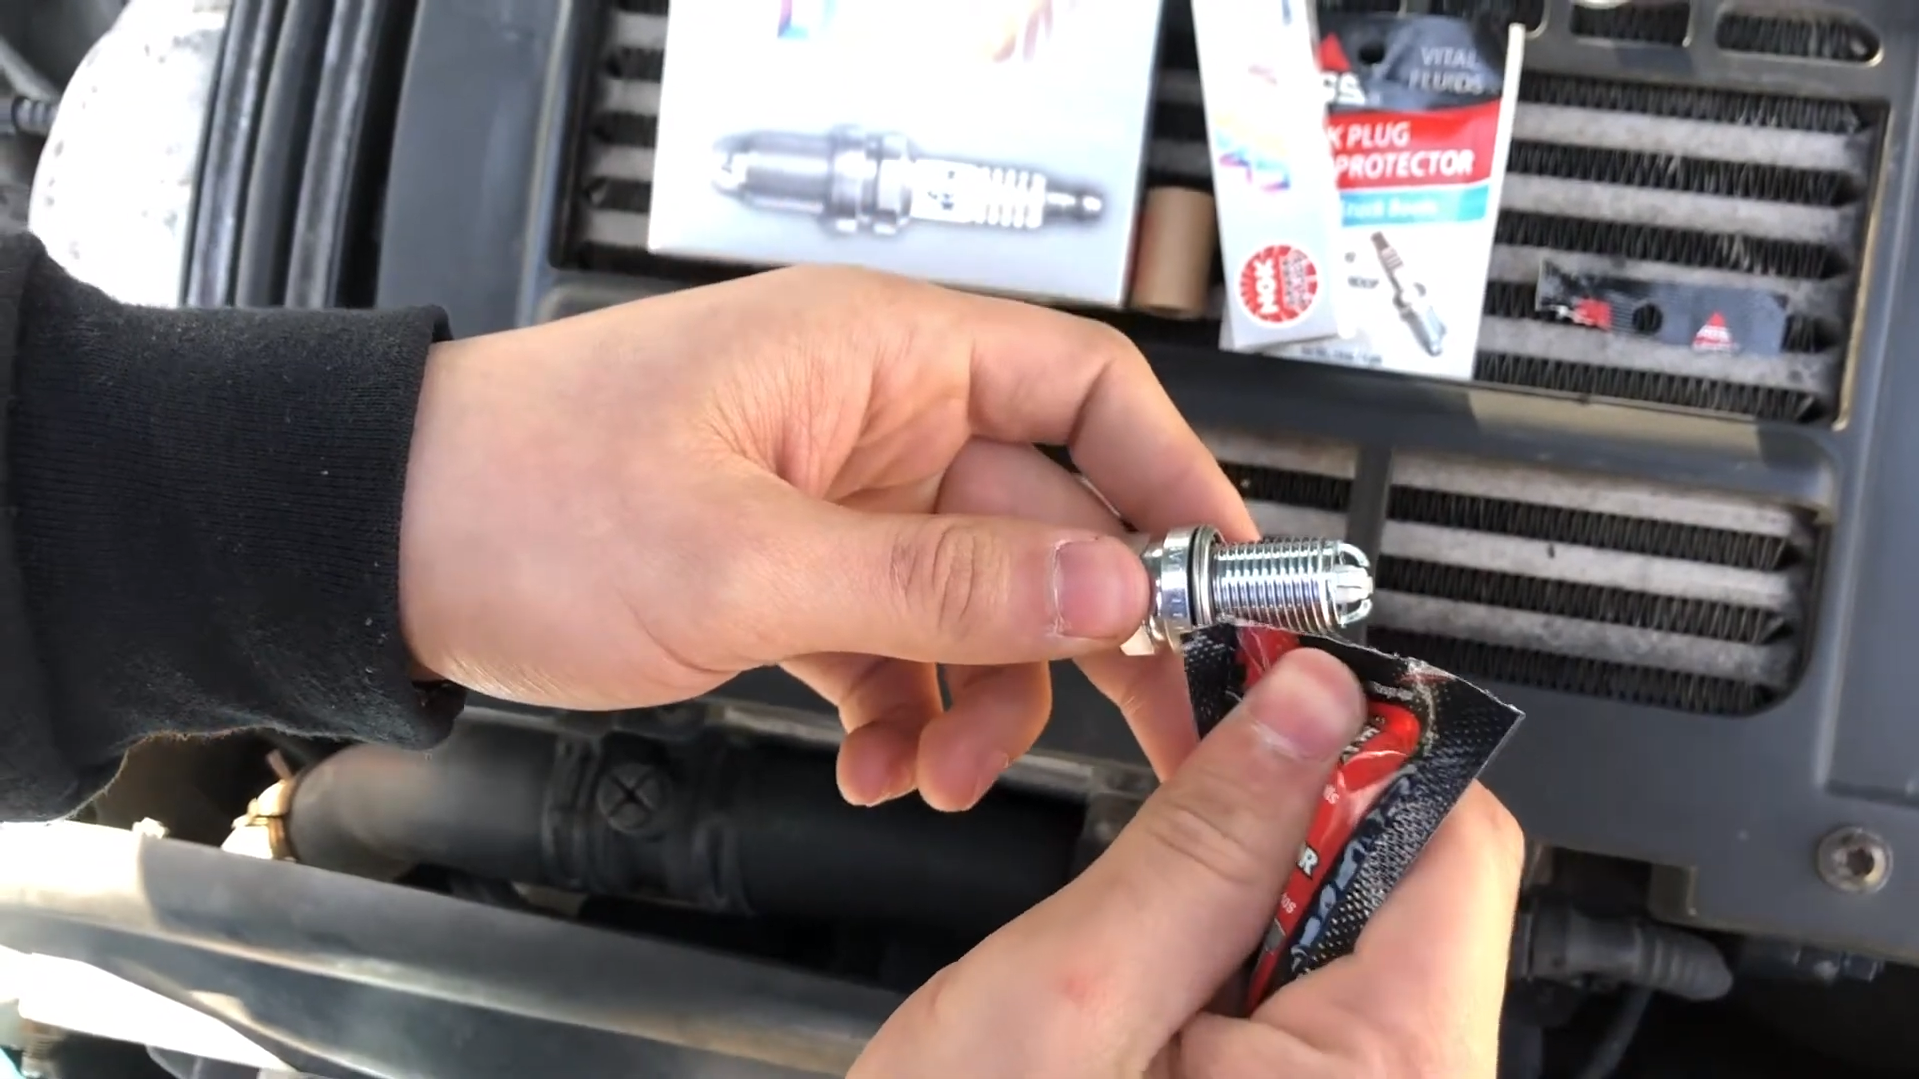
Applying the spark plug boot protector grease is a simple but critical process that ensures the longevity and efficiency of your spark plug boot protector. Start by carefully cleaning the inside of the boot and the spark plug terminal to remove any dirt, grime, or old grease that may hinder the proper functioning of your ignition system. Taking the time to thoroughly clean these components will pave the way for optimal performance.
Once they are clean, gather a small amount of dielectric grease, about the size of a pea, on your finger or a small applicator. The dielectric grease, with its excellent insulating properties, will act as a protective barrier, preventing moisture, debris, and other contaminants from compromising the spark plug boot’s integrity.
Once the grease is applied, carefully slide the boot back onto the spark plug, ensuring a snug fit. This step is crucial, as a secure connection between the boot and the spark plug is vital for optimal performance. A loose or improperly fitted boot may result in decreased engine efficiency or misfires.
To further enhance the protection and insulation provided by the spark plug boot protector, carefully fit it over the greased boot as previously instructed. The boot protector will act as an additional layer of defense, safeguarding the boot from exposure to external elements that may compromise its performance.
By following these detailed steps and taking the time to apply the grease correctly, you are ensuring the longevity and efficiency of your spark plug boot protector. This meticulous process will help maintain the integrity of your ignition system, allowing for smooth and reliable engine operation. [1]
How to Use Spark Plug Boot Protector Heat Shield
Using a Spark Plug Boot Protector Heat Shield effectively is crucial in maintaining the longevity and performance of your spark plug boot. After the careful application of dielectric grease and fitting of the boot protector, you can proceed with using the Heat Shield to provide an extra layer of protection.
To ensure proper installation, start by sliding the Heat Shield onto the spark plug boot. Take care to ensure that it covers the entire boot and fits securely, leaving no gaps or loose ends. The Heat Shield should be oriented in such a way that the wider end faces towards the engine, maximizing its ability to shield against heat radiating from the exhaust manifold. This strategic positioning ensures that your spark plug boot remains shielded from the intense heat generated by the engine’s exhaust system.
With the added protection of the Spark Plug Boot Protector Heat Shield, you can confidently tackle any driving conditions or operational demands, knowing that your spark plug boot is well-guarded against the damaging effects of heat. Invest in the longevity and reliability of your vehicle’s ignition system by incorporating this simple yet essential component into your maintenance routine. [1]
FAQ
Is spark plug boot protector necessary?
Yes, a spark plug boot protector is highly recommended for any vehicle. It serves as a defensive shield against the intense heat typically generated in the engine compartment, particularly near the exhaust manifold. This heat can degrade the spark plug boot over time, causing misfires or complete ignition failure. By using a spark plug boot protector, you’re effectively prolonging the lifespan of your spark plug boot, improving the efficiency of your ignition system, and potentially saving on costly repairs in the future. Furthermore, the use of a boot protector helps to maintain the stable electrical connection necessary between the ignition coil and spark plug, ensuring optimal vehicle performance. Therefore, while not mandatory, the use of a spark plug boot protector is a preventive measure that promotes the health of your vehicle’s ignition system.
What does a spark plug boot protector do?
A spark plug boot protector serves as a barrier against the high temperatures generated within the engine compartment, particularly those emanating from the exhaust manifold. It is designed to shield the spark plug boot, which is a critical component of the ignition system, from heat-induced damage. Over time, exposure to extreme heat can deteriorate the boot, leading to misfires or even complete ignition failure. By using a boot protector, you can significantly extend the life of your spark plug boot, improve the overall efficacy of your ignition system, and prevent costly repairs down the line. Moreover, the boot protector aids in maintaining a reliable electrical connection between the ignition coil and spark plug, ensuring peak vehicle performance. To summarize, a spark plug boot protector plays a significant role in preserving the health and longevity of your vehicle’s ignition system.
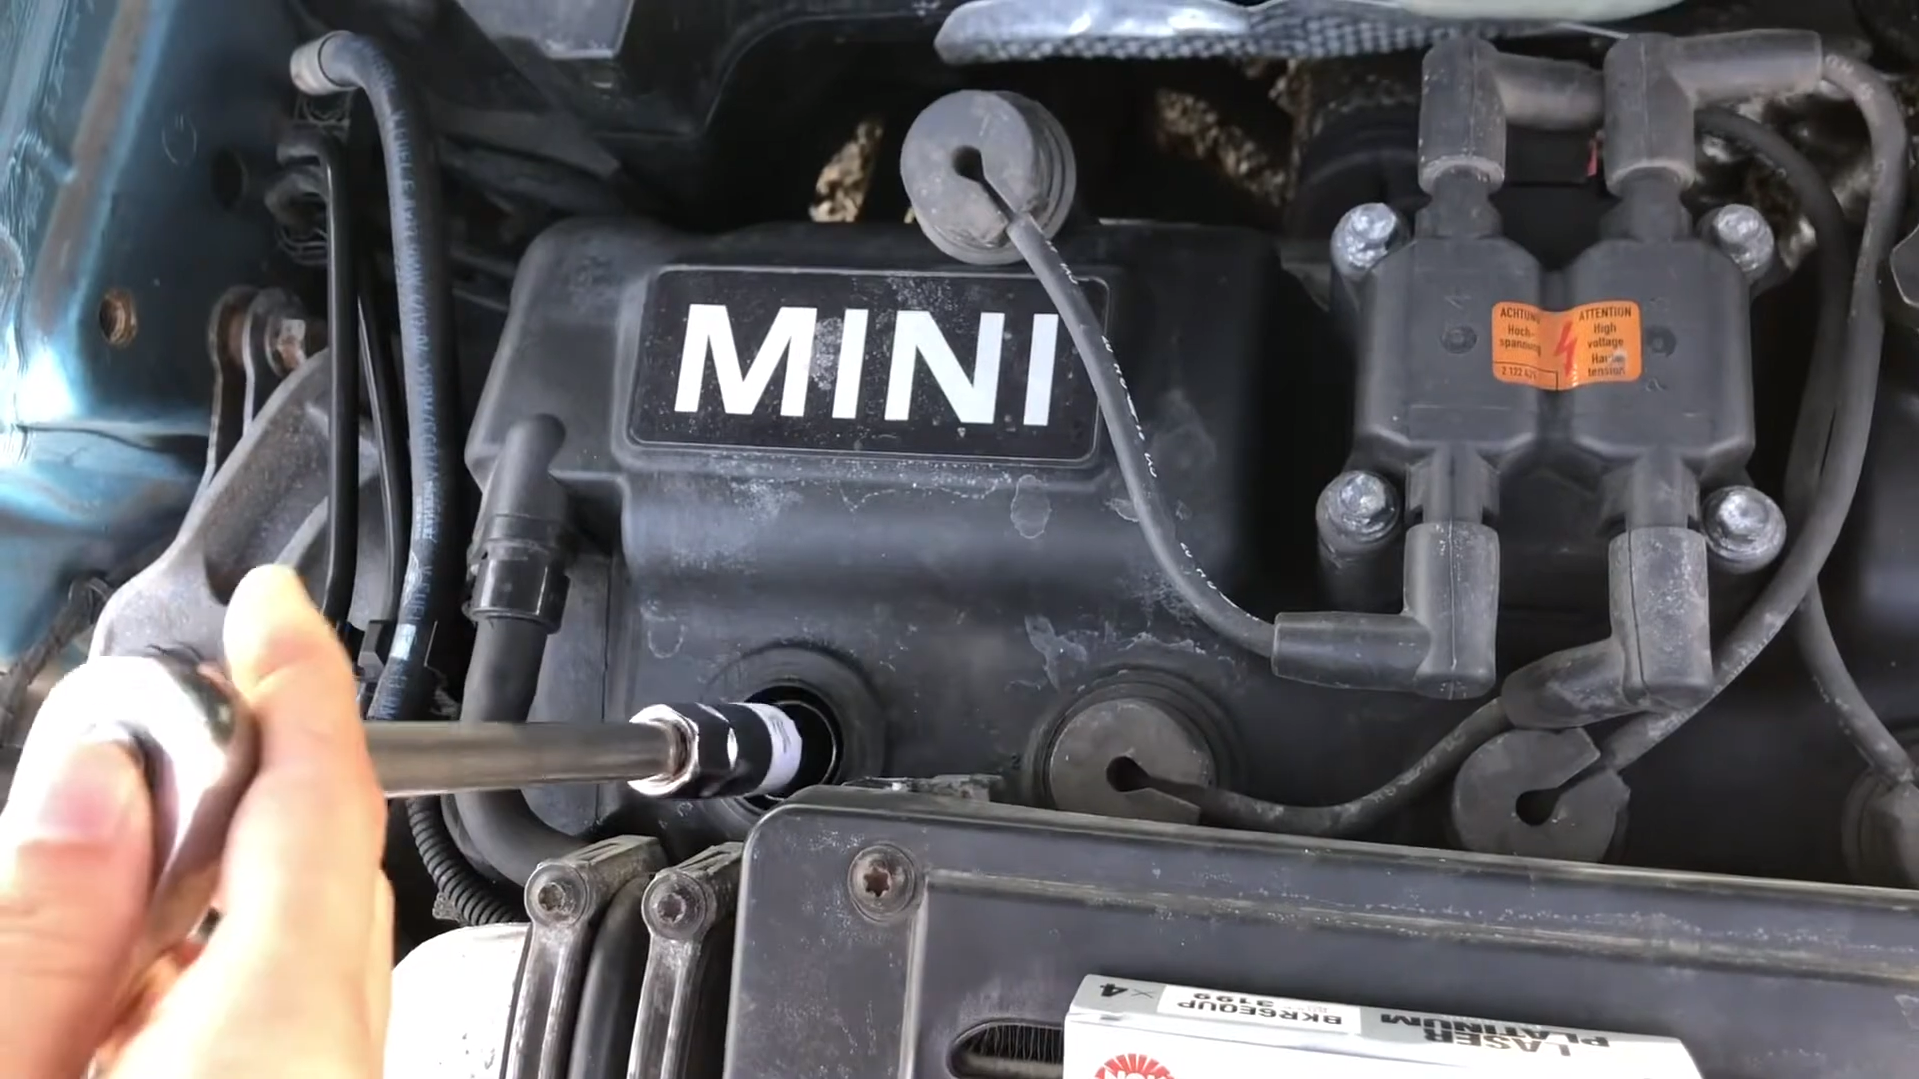
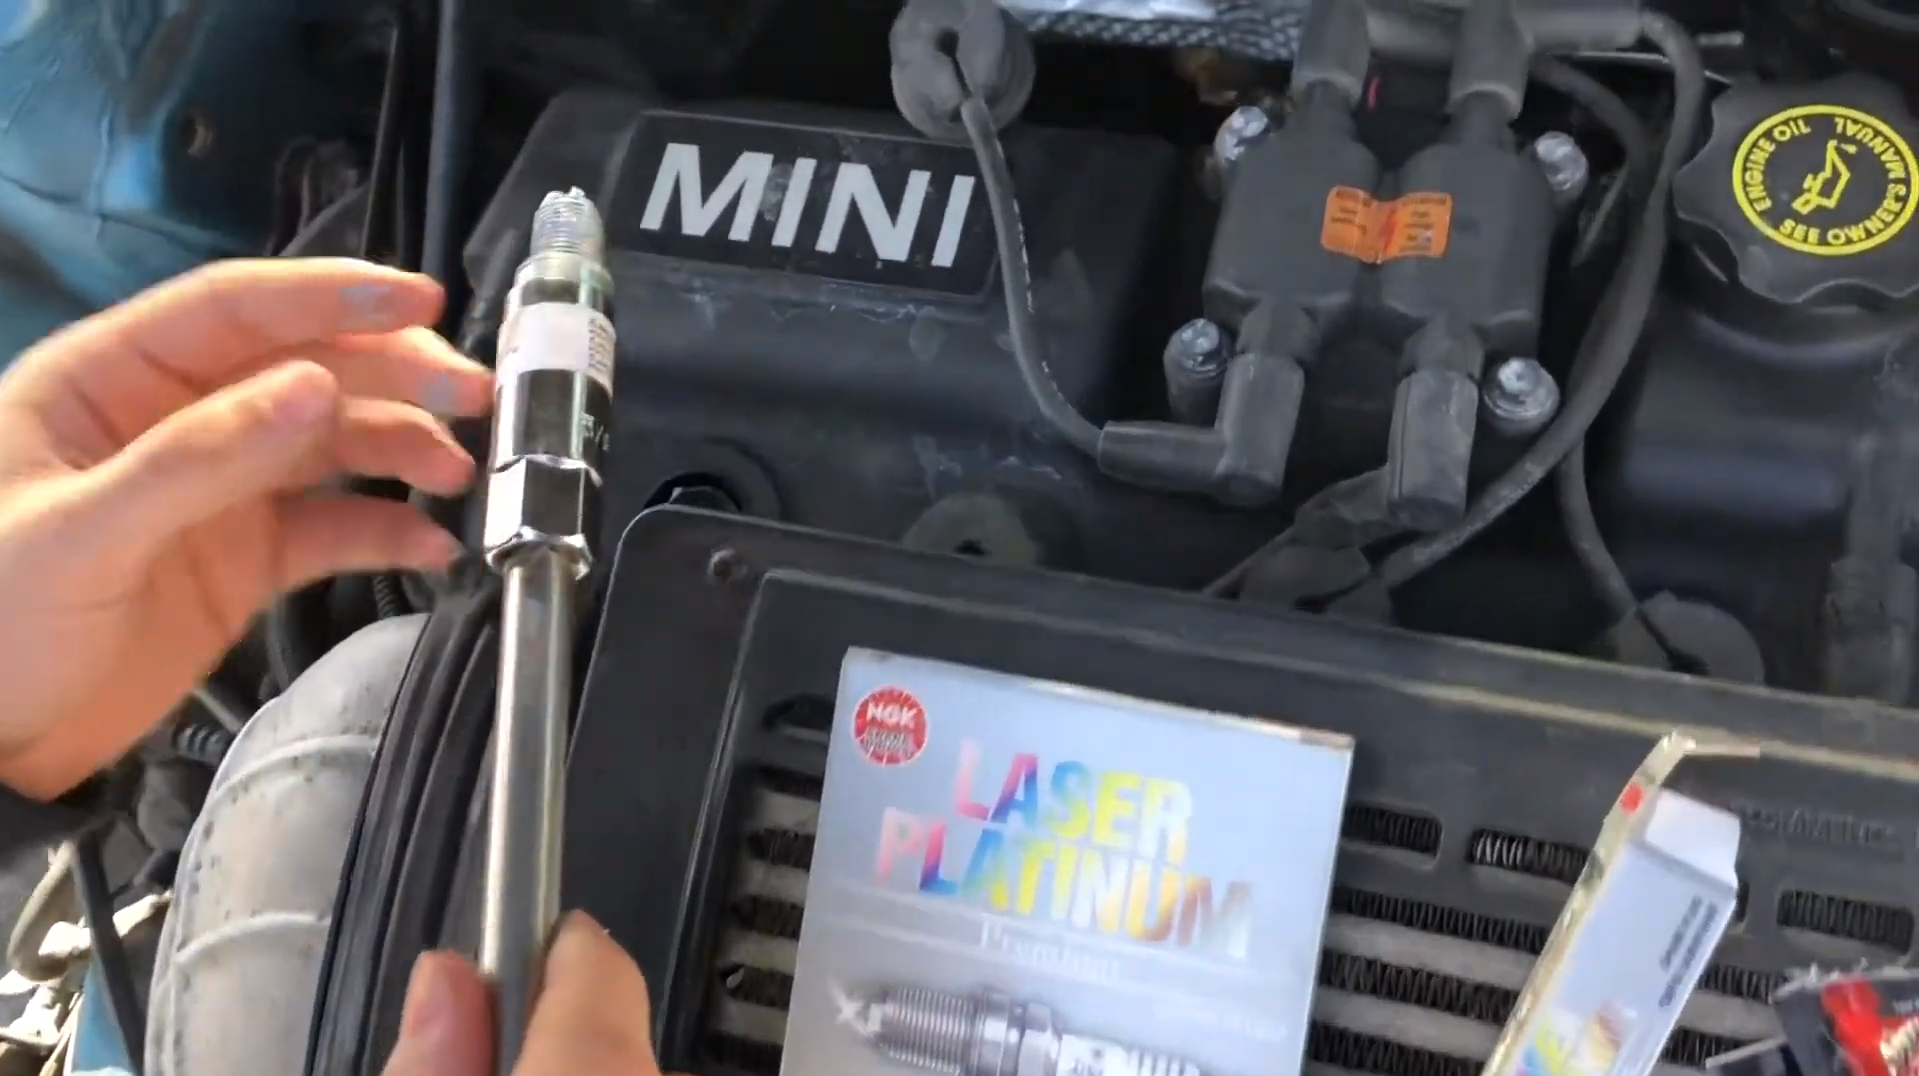
How to install NGK spark plug boot?
Installing an NGK Spark Plug Boot involves a straightforward process. Begin by cleaning the area around the spark plug to avoid any dirt or debris getting into the engine. Then disconnect the old spark plug wire, taking note of where it connects to the ignition coil.
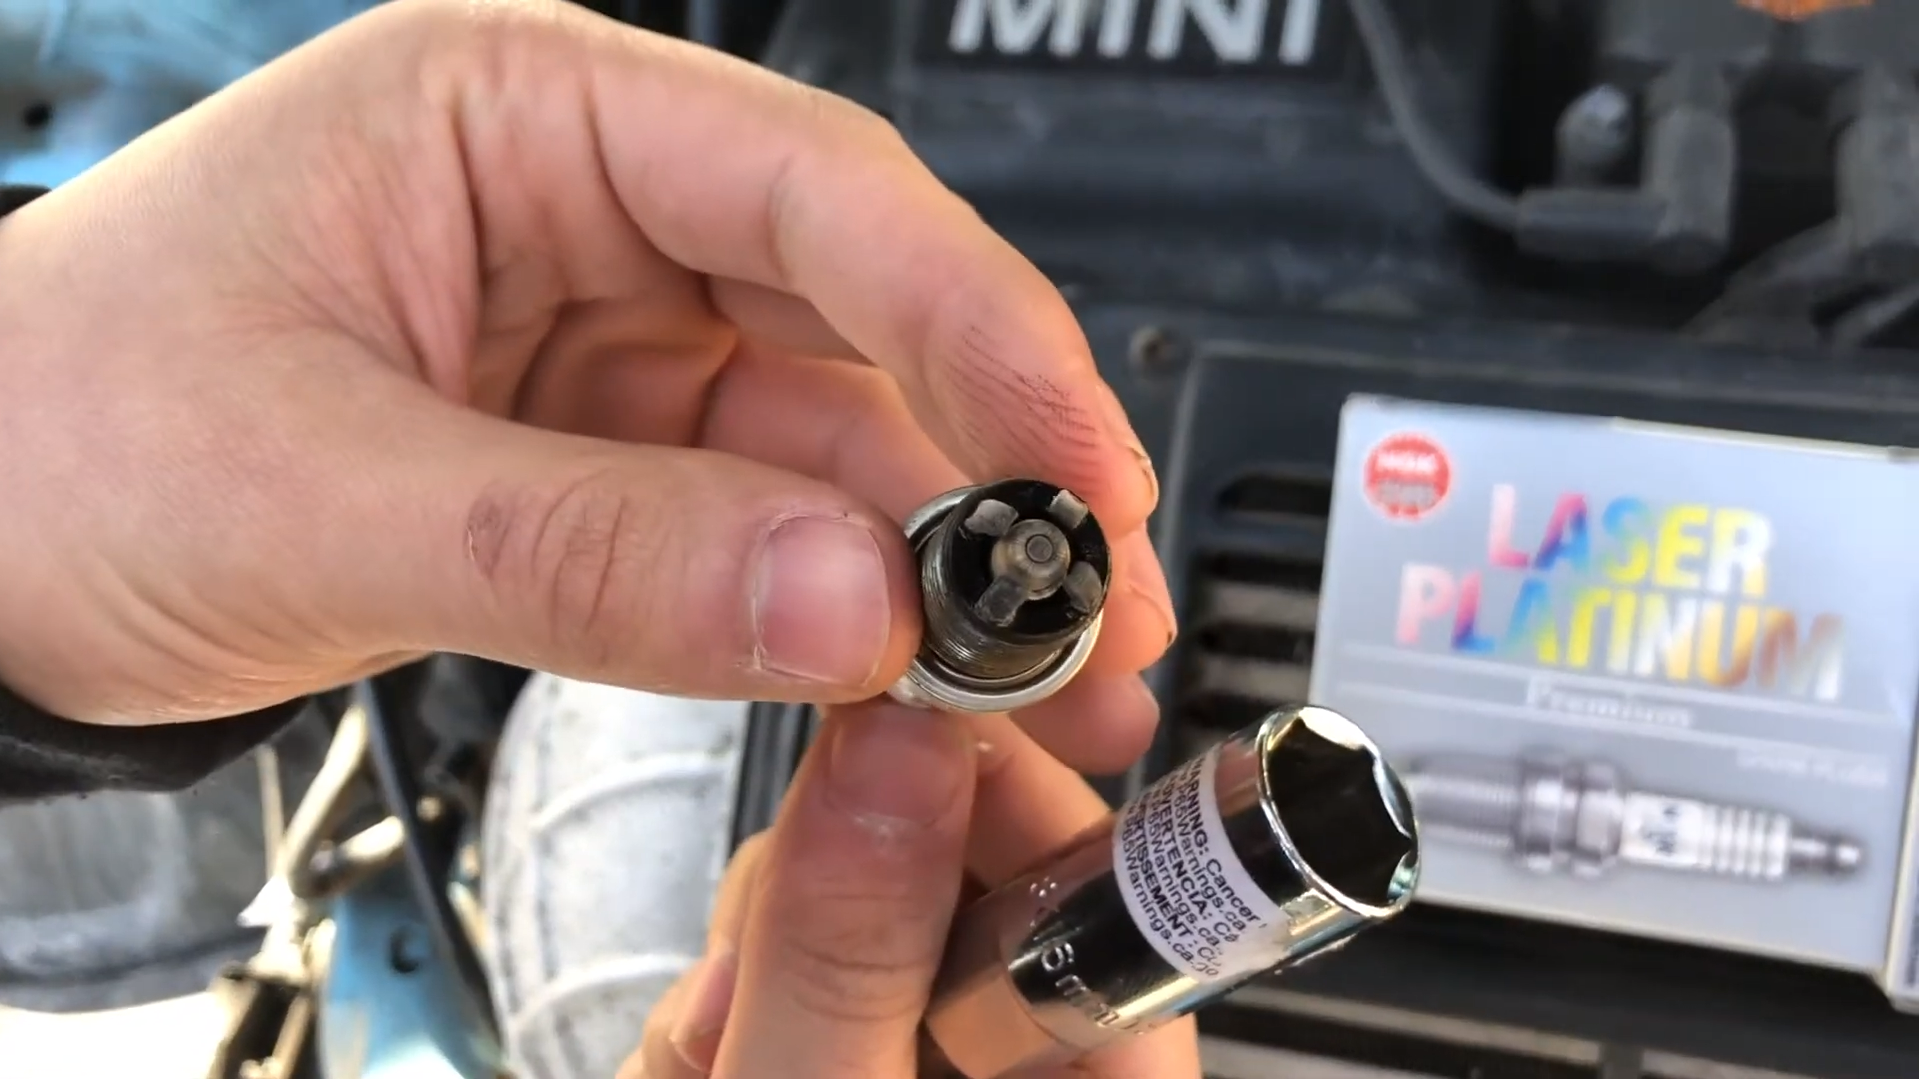
Remove the old boot and inspect the spark plug for any signs of wear or damage. If the spark plug is in good condition, you can proceed with the installation of the new boot. Slide the NGK Spark Plug Boot over the spark plug wire, ensuring that it’s facing the correct way.
Next, connect one end of the spark plug wire into the NGK Spark Plug Boot, and the other end into the ignition coil. Make sure to secure the boot onto the spark plug, ensuring that it’s tightly fitted.
Once everything is correctly installed and secured, start your engine to check if it runs smoothly. If there are any issues, double-check your connections and make sure that the boot is correctly installed. Remember, a properly installed spark plug boot can enhance your vehicle’s performance and fuel efficiency.
Do I need to replace the spark plug boot?
The necessity of replacing the spark plug boot often hinges on its condition, which can be influenced by several factors such as heat exposure, time, and the nature of your vehicle’s use. Over time, heat from the engine can cause the boot to degrade, potentially leading to misfires or complete ignition failure.
If you’re experiencing any of these issues, or if the boot appears worn or damaged during a routine inspection, it’s likely time for a replacement. Regular checkups and preventive maintenance can help detect these issues early, ensuring your vehicle’s ignition system remains in optimal condition. Replacing a worn spark plug boot not only averts potential engine problems but also helps maintain peak vehicle performance and fuel efficiency.
Remember, when in doubt, it’s always a good idea to consult with a professional mechanic or your vehicle’s manufacturer for personalized advice.
How do you put a spark plug cap on?
Installing a spark plug cap, also known as a boot, is a straightforward process. Start by cleaning the area around the spark plug to ensure no dirt or debris enters the engine. Disconnect the existing spark plug wire and inspect for damage. If all is well, slide and secure the new cap onto the wire, connecting it to the spark plug and ignition coil. Verify smooth engine operation and consult a professional if needed. Proper installation helps maintain vehicle performance and fuel efficiency.
Useful Video: R53 Spark Plug Replacement
Conclusion
In summary, the use of a spark plug boot protector is an essential preventive measure that can save you from costly repairs and ensure optimal vehicle performance. Its critical role in safeguarding the spark plug boot from heat-induced damage cannot be overstated. Regular inspection and timely replacement of the spark plug boot also contribute significantly to the overall health and efficiency of your vehicle’s ignition system. While the process of installing an NGK Spark Plug Boot or a spark plug cap might seem straightforward, it requires careful attention to detail. If you’re uncertain about any steps or notice any issues post-installation, never hesitate to consult with a professional mechanic or your vehicle’s manufacturer.
References:
- https://theautovibes.com/how-to-use-spark-plug-boot-protector/